5.27.2008

Peanut Butter Chip Cookie Pie

(That's a mouthful, isn't it?)

Today's been an odd day. After running some errands, I got home and decided to attempt a blackberry/raspberry clafoutis. And, well, something happened, and I found it to taste like scrambled eggs, but with the added berries. It was bizarre. Dave took one bite and choked it down, then pushed the dish away. Hmm. Maybe I attempted clafoutis a bit too soon.

Moving on, the subject line happily used up two things: pie crust and the bag of peanut butter chips. Found over at the Hershey's website, it's an incredibly easy pie to put together. Super-duper easy, if you will. Unlike the linked recipe, I only used the peanut butter chips, as my remaining chips probably wouldn't have gone together all too well. (Raspberry and peanut butter? No, thank you!)

It's very peanut buttery. The whole wheat crust that I had doesn't quite go with it, but Dave ate his entire slice, so that's a good sign. I'd make it again.


Ingredients:
½ cup butter, softened
2 eggs, beaten
2 tsp. vanilla
1 cup sugar
½ cup flour
2 cups peanut butter chips
1 unbaked 9" crust

Directions:
Preheat oven to 350F.

Beat butter until smooth, then add eggs and vanilla. Stir together the sugar and flour, then add to the butter mixture, beating until smooth. Stir in peanut butter chips. Pour into crust.

Bake at 350F for 50-55 minutes, or until golden brown.

5.26.2008

Deep Dish Mint Brownies

Oddly enough, I do my best thinking while walking. Luckily, I enjoy walking. ;) I normally do about 15-20 miles per week and when I'm by myself, that's when I'm thinking of what to make.

I knew I wanted to do something for Amelia that was minty and chocolatey. Because she, too, feels that whoever put together chocolate and mint needs to be sainted. We had plans for dinner tonight, so my time was limited. I wound up going with a basic brownie recipe, adding peppermint extract and the Andes Creme de Menthe baking pieces. I love those little things.

When they first came out of the oven, they were nearly busting out over the top of the pan. Quite the brownie. The center does sink a bit as it cools, and when cut, they get that crumbly top along the edges. Yummy!


Ingredients:
3/4 cup flour
½ cup cocoa
½ tsp. baking powder
½ tsp. salt
3/4 cup butter, melted
1½ cups sugar
1 tsp. peppermint extract
3 eggs
1 cup peppermint chips

Directions:
Preheat oven to 350F. Grease an 8- or 9-inch square baking pan.

Sift together flour, cocoa, baking powder, and salt; set aside.

Cream butter, sugar, and peppermint extract until smooth. Add eggs. Gradually add flour mixture, beating until combined. Spread into prepared pan.

Bake at 350F for 40-45 minutes, or until a toothpick inserted near center comes out clean. Let cool completely before cutting into bars. Makes about 16 brownies.

5.24.2008

Toffee Blondies

In yet another attempt to work through some of the bags of baking chips I have left, I decided to make blondies for Johanna last night. We only work together for three more days, so it's only fair. Plus I thought I'd surprise her.

There was about half-to-three-quarters of a bag left of the Heath Toffee Bits, thus our blondie was born.

No picture, as it was late last night when I made them and then very early this morning when cutting them to bring to work. Jo's happy with them, so that's what's important. :)

Ingredients:
1 cup flour
½ tsp. baking powder
1/3 cup butter, melted
1 cup brown sugar
1 egg
1 tsp. vanilla
1 cup Heath Toffee Bits

Directions:
Preheat oven to 350F. Grease an 8x8-inch baking pan.

Sift together flour and baking powder; set aside.

Cream butter, brown sugar, egg, and vanilla until smooth. Gradually add flour mixture. Stir in toffee bits. Spread in prepared pan.

Bake at 350F for 22-25 minutes, or until a toothpick inserted near center comes out clean. Let cool completely before cutting. Makes about 16 bars.

5.20.2008

SHF : Lime Cheesecake Squares


I've been reading the Sugar High Friday blog events (started by Jennifer of The Domestic Goddess) since... well, even before I had a blog myself. And when I saw that Tartelette was hosting this one and the theme was citrus? Oh yeah. I had to be there and you know it was going to be lime.

What really stuck out was cheesecake. But with moving cross-country in, oh, 18 days, I didn't want to do a big cheesecake. Mini was the way to go, and, hey, how 'bout using that cakelet pan? The idea was set and a recipe was formed.

I only made six, as I didn't want to be eating them for the next week. If they lasted that long. The amount of lime juice to use was a guess, and these babies are tart. But, oh, the yum factor. This is mouth-puckeringly good. The cheesecake is light and fluffy, as all cheesecakes should aspire to be. :)


Ingredients:
6 Tbsp. graham cracker crumbs
2 Tbsp. butter, melted
¼ cup sugar

8 oz. cream cheese, softened
1 egg
1/3 cup sugar
¼ cup lime juice
Zest of one lime

Directions:
Preheat oven to 325F. Line 6 cakelet cups with foil. Be sure to leave enough of a 'handle' on each side for easy removal.

Mix together the graham cracker crumbs, butter, and sugar, then press into the prepared pan.

Beat cream cheese, egg, sugar, lime juice, and zest until smooth. Fill 3/4s full.

Bake at 325F for 18-20 minutes, or until set. Let cool in pan for an hour, then remove to the fridge for at least 40 minutes before serving.

Madeleines

The first time I ever had a madeleine cookie was in January 2001, having gone with a friend to the Starbucks in Providence, RI. It was also my first Starbucks trip, too, because even still, back home, Dunkin' Donuts is EVERYWHERE. Within five miles of my parents' house, there's easily six or seven of them. While out here, in that same distance, there's the same amount of Starbucks. Actually, wait, it might be closer to ten. And that's where my loyalty lies, because I <3 chai tea. ;)

I digress. At the first bite, I was amazed by the flavor that came out of this shell-shaped cookie. Light and buttery and just wonderful. After much coveting, I received a madeleine pan for Christmas one year. But, like many ventures in life, I was hesitant because I was worried they wouldn't come out good. I decided to conquer that fear yesterday.

The recipe is from the Williams-Sonoma Cookbook with a Guide to Kitchenware, according to the printed recipe that was taped to the pan itself. I had my concerns, and even "consulted" with Dorie, but went with the WS recipe in the end, minus the orange-flower water.

And the results? Light and buttery. Slightly crispy on the outside of a few, but that's due to the butter on the pan, I'm thinking. Henelyne was here while I was making them and she tried one when it was still warm and LOVED it. She had never heard of or seen a madeleine before; her words were "it's crisp on the outside and soft on the inside - it's like it has its' own full edge!" (She's an edge-girl when it comes to brownies and bars).

So yay! I made madeleines and they didn't suck! LOL


Ingredients:
5 Tbsp. butter, melted
½ cup flour
½ tsp. baking powder
Pinch of salt
1 egg
Grated zest of ½ a lemon
1 tsp. orange-flower water (optional)
1/3 cup sugar

Directions:
Preheat oven to 375F. Brush a little of the melted butter in the molds of madeleine pan. Reserve the remainder and let cool to lukewarm.

Sift the flour, baking powder, and salt into a bowl. Combine the egg, lemon zest, orange-flower water, and sugar, and beat lightly. Stir into the flour mixture and beat until well combined. Add the reserved butter and beat just long enough to incorporate thoroughly without over-mixing. Spoon the batter into the prepared molds, filling each one half-full. Place on the middle shelf of the oven.

Bake at 375F for 12-15 minutes, until golden and starting to brown at the edges. Unmold and place on a wire rack to cool. Makes 12 3-inch cookies.

5.12.2008

King Arthur's Triple Play Peanut Butter Cookies

Countdown to moving: 26 days. (Holymoly)
Bags of baking chips left: 11 (and three half-bags)
Boxes packed: 1

Granted my math skills aren't the greatest in the world, but there's just something not right with those numbers. I need to make the 11 and 1 switch places, I'm sure. So when I came across this recipe over at Cookie Madness, I knew it'd go over well. Dave loves peanut butter cookies, so I figured they'd disappear fast. Surprisingly, there are still some on the plate. ;)

I split the recipe in half, making about 18 cookies, with some extra dough leftover. The mixing method is different than most cookies, but the end result is fabulous. It's puffy and firm. I made them a bit larger, using a 2 Tbsp. scoop (I think), and they seem the type that you'd find in bakeries or coffee shops. :) Oh, and instead of using pb chips, I used a bag of the chocolate/caramel swirled morsels that needed to be used.


Ingredients:
½ cup butter
½ cup brown sugar
½ cup sugar
2/3 cup peanut butter
½ tsp. vanilla
¼ tsp. baking powder
¼ tsp. baking soda
¼ tsp. salt
1 egg
1¼ cups flour
2/3 cup chips (pb, chocolate, any kind you'd like)

Directions:
Preheat oven to 350F. Line a baking sheet with parchment paper.

Cream butter, brown sugar, suga, peanut butter, vanilla, baking powder, baking soda, and salt. Add egg, mixing well. Add flour, beating until completely incorporated. Stir in chips. Drop by the tablespoonfull onto baking sheet.

Bake for 10-12 minutes, or until edges are lightly brown. Cool on sheet for about five minutes before moving to wire racks.

Makes about 18 cookies.

Chocolate Mint Brownie Sticks

Every Monday (or whatever my first day off that week is) I walk over to the library. Usually I'm just in and out, returning and picking up more books, but today I decided to peruse the cookbook section. Having heard of Maida Heatter before but never making anything from her books, I sat down with her Book of Great Desserts today and proceeded to drool. LOL These caught my eye rather quickly... I'm a firm believer that whoever first put chocolate and mint together deserves to be sainted. I grabbed a pencil and paper and started copying. (Because the copy machine never came to mind. lol)

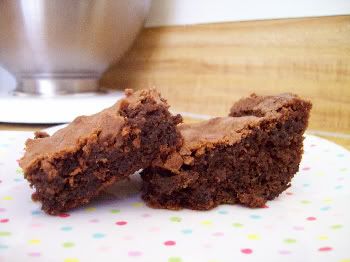
They come together very easily. I had some concerns, as the color of the batter was a little light. Almost caramel colored, but I popped it in the oven, hoping for the best. They kept that color after baking, too. Instead of mini chocolate chips, I used the Andes Mint Baking Pieces, for an added minty kick. The mint layer came together easily and made me think of Junior Mints. And I finally had a use for the Guittard Unsweetened Chocolate Chips that I bought - woohoo!

Altogether, they're pretty good. Even after being in the fridge for an hour, the brownie base part is very sticky. I had a hard time cutting them apart, between the sticky base and the foil. But they're minty and chocolatey and cool. And incredibly easy to put together.


Ingredients:
2 oz. dark chocolate
½ cup butter
2 large eggs
1 cup sugar
¼ tsp. salt
½ tsp. vanilla extract
½ cup all purpose flour
½ cup mini chocolate chips (optional)

Directions:
Preheat oven to 350F. Line a 9-inch square pan with aluminum foil and lightly grease.

Melt chocolate and butter together in a small bowl in the microwave, stirring after every 30-second interval until smooth. Set aside to cool.

In a mixer bowl, beat eggs with sugar, salt and vanilla extract until smooth. Beat in chocolate mixture, then stir in the flour at low speed. Mix in chocolate chips, then pour batter into prepared pan.

Bake at 350F for 28 minutes, until a toothpick inserted into the center comes out clean. Cool completely on a wire rack.

Mint Icing
2 Tbsp. butter, softened
1 cup confectioners’ sugar
1 Tbsp. milk or cream
½ tsp. peppermint extract

Mix all ingredients in a small bowl until smooth. Spread evenly on cooled chocolate base, then refrigerate for exactly 5 minutes while you make the chocolate glaze.

Chocolate Glaze
1 oz. unsweetened chocolate
1 Tbsp. butter

Melt together chocolate and butter in a small bowl, in the microwave, stirring after every 30-second interval until smooth. Immediately pour the chocolate glaze over the chilled base. Tilt the pan around to coat the mint layer as much as possible, or drizzle over evenly. Refrigerate for at least 30 minutes before removing foil and chocolate bars from pan and cutting into 24 thin bars with a sharp knife.

Sticks can be served at room temperature, but are best when chilled or frozen.

5.11.2008

Ladyfinger Sandwiches

These came about kind of randomly, in search of something OTHER than Tiramisu to use my ladyfingers with. And at first, I even thought, maybe I could do my own pastry cream, something tasting like the custard from Boston Cream Pie. But the reliable fear of making my own custard rose back up, and I wound up using vanilla pudding. I think chocolate would be better, but I knew that if it was chocolate, Dave wouldn't eat it. *shrug*

It is completely easy to make and easy to change flavors, just by using a different pudding. A quick dessert or nighttime snack. And you'll have pudding left over afterwards to enjoy by itself. :)

(Because, really, how much more can I say about these? LOL)


Ingredients:
Instant pudding, any flavor you'd like
Ladyfinger cookies

Directions:
Make pudding according to package directions and let set. Spread onto ladyfingers. Enjoy.


(Yeah, told you it was easy LOL)

5.07.2008

Oatmeal Cookie Bars

Despite the date of posting, I made this on Monday along with the cupcakes. But time has that funny way of working against me. (Seriously, gravity and time totally have vendettas against me.) I really wanted something that was simple to put together and would use up some of the many bags of baking chips that are currently in residence here.

I had saved the recipe from Cookie Madness a few months ago and finally got around to making it. My goal was somewhat reached: I used up two of the half-bags of chips that were floating around. Still have at least ten more that I would like to use before moving in a month. Oy!

I added some toffee chips to the dough, as well as some chocolate chips to sweeten it up a bit more. On the top, after spreading the chocolate, I sprinkled the remainder of the semi-sweet chips, some Guittard white chips, and some more toffee. Dave ate four of them when he got home from work, when they were still ooey-gooey-melty. Works for me. :)

(No picture as they didn't hold up well when cut and lifted. It's okay. Think of it as a sacrifice to the baking gods) ;)

Ingredients:
½ cup flour
½ cup oats
½ cup butter
¼ cup brown sugar
¼ cup sugar
1 egg

1 Tbsp. butter
½ cup morsels

Morsels for sprinkling on top

Directions:
Preheat oven to 350F. Grease an 8x8-inch baking pan.

Whisk together flour and oats; set aside.

Cream butter and sugars until fluffy. Add egg. Add flour mixture. Spread into prepared pan.

Bake at 350F for 15-20 minutes or until lightly browned. Melt butter and morsels in microwave, then pour over cookie base. Let cool for a few minutes before sprinkling morsels on the top.

5.06.2008

Strawberry-Filled Lime Cupcakes

So I kinda forgot that I had another package of strawberries in the fridge when I bought two more. They were on sale and I'm a sucker for strawberries, what can I say? I started thinking and somehow the Lime Monster came in my mind and decided upon these cupcakes.

But then the Lime Monster started getting greedy. He didn't want strawberries in HIS cupcakes. He convinced two of the berries to off themselves by rolling off the cutting board and onto the floor of despair. Worry not, dear readers, I fought the good fight and assigned both the Lime Monster and the berries to some joint counseling, where they worked out their differences and now live together, peacefully, in cupcakey bliss. It's a tough job, but somebody's gotta do it. :)

I used the margarita cupcake recipe, minus the tequila, since those had more of a lime taste, and used the icing from the original lime cupcakes. They came out good. Dave even ate two, shockingly enough. The lime taste is subtle on the outer rim, but overpowered by the berry in the center. So it's like two cupcake flavors in one. I tried to get a picture of the cupcake split in half, so that the strawberry would be visible by it didn't come out well. The berry made the icing get runny and it just wasn't a pretty picture.


Ingredients:
1-1/3 cups flour
¼ tsp. baking soda
½ tsp. baking powder
½ tsp. salt
3/4 cup sugar
¼ cup lime juice
1½ tsp. lime zest
1 cup milk
¼ cup oil
½ tsp. vanilla
12 strawberries

Directions:
Preheat oven to 350F. Line 12 muffin cups with paper liners.

Whisk together flour, baking soda, baking powder, and salt; set aside.

Beat sugar, lime juice, zest, milk, oil, and vanilla until combined. Add in flour mixture, beating until incorporated. Fill cupcake liners about 3/4s full, then place berry in center of each one.

Bake at 350F for 18-22 minutes, or until a toothpick inserted along the outer edge of the cupcake comes out clean. Let cool completely on wire rack before icing.

Lime Icing:
¼ cup butter, softened
1 Tbsp. milk
3 Tbsp. lime juice
2 cups confectioners' sugar

Mix butter, milk, and lime juice until combined. Add sugar, 1 cup at a time, beating until smooth.